
These cookies were made out of white Crayola Model Magic, acrylic paints and white glue. They were cut out with a Maple leaf shaped and acorn cookie cutter.
Today they were totally dry and ready for painting.
Directions for Painting Faux Leaf Sugar Cookies
The first step is to line a drying tray with wax paper.
In the below photograph, I have a sample real sugar cookie and a small maple leaf next to the faux cookies.
When mixing acrylic paints, it is easier to get a closer color match if you actually look at a real sugar cookie.
I saved the maple leaf so I can see how the veins in the leaf run.
 Faux Leaf Cookies with a Real Cookie and Maple Leaf
Painting the Faux Leaf Cookies
In this photograph I am mixing together white, tans, yellow and brown acrylic paints.
I find that working in the daylight is helpful as the color will be different if you are mixing paints at night.
I’m using a small paint brush and working on a piece of wax paper.
 Mixing Acrylic Paints with Small Brush
 First Layer of Acrylic Paint
These faux sugar cookies have one layer of paint on them.
The coloring is a little on the light side but I will adding touch up paint so it should work out.
It’s easy to over do the coloring, so step back and look a second time before adding more paint.
After the first paint coating is dry, you can begin painting the edges.
The goal is to make the cookie edges look slightly brown like they just came out of the oven.
Mix up a small batch of acrylic paint slightly darker than your base shade. Add a little dot of brown paint to your paint mixture.
For this part of the painting, I use water to slight blur the edges of my paint brush strokes.
Slightly wet your index finger with water and rub over the faux cookie until you get the look you want.
 Faux Leaf Cookies Painted on Edges
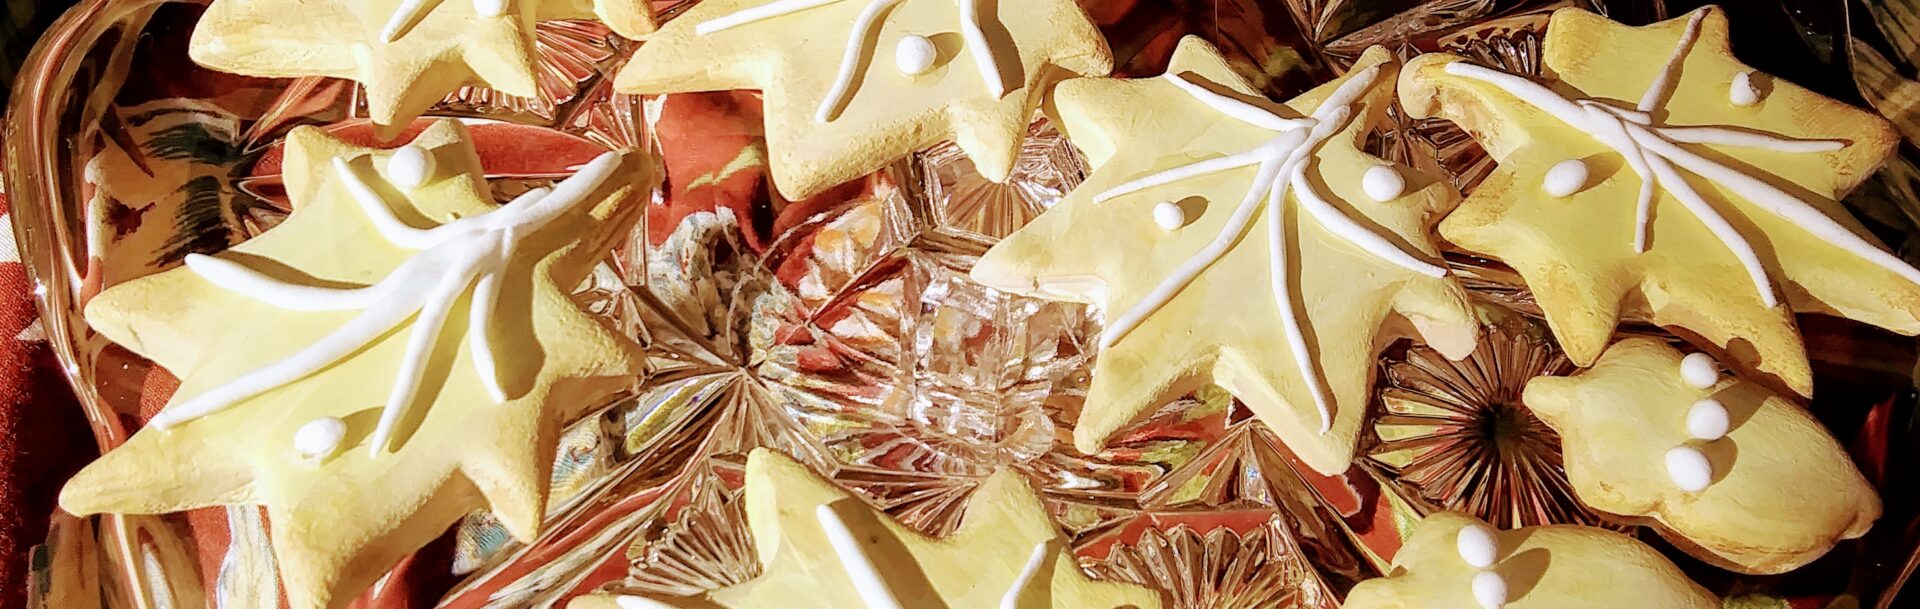
 Completed Faux Leaf Sugar Cookies
Finishing the Faux Leaf Sugar Cookies – Adding Faux Royal Icing
After painting the faux cookies, I decided to add some faux Royal icing.
To do this, roll a small around white Crayola Model Magic out into thin strips. Simulated the veins in the leaf. Lastly I added two tiny white dots to each leaf and three dots to each acorn top.
Place the leaf veins on each leaf to make sure they fit and allow to dry a couple of days.
After two days, carefully remove the leaf and dots. Glue on with a tiny amount of white household glue. Do not use too much glue as you do not want clumps of glue on your faux cookies. It helps to use a small brush to apply the glue.
 Faux Leaf Surgar Cookis on a Cookie Stand
When dry, the faux leaf cookies are now complete and ready for display.
One note is that instead of decorating with faux white Royal icing you can also sprinkle with crystal coarse glitter and a little glue.
The faux leaf cookies also look good enough to eat and will work wonderful in your display.
Happy Faux Food Crafting!
 Faux Leaf Cookies on Serving Dish