
Blanching green beans was on my early morning list of things to do. That was because I was given a large amount of green beans fresh from the garden. I didn’t want to waste any of them, so I decided to blanch and freeze a portion of them. There was just too many for my family to eat before they went bad.
Blanching Green Beans
The tough ends of the green beans were first cut off. The person who gave me the green beans had already washed them and cut the ends off.
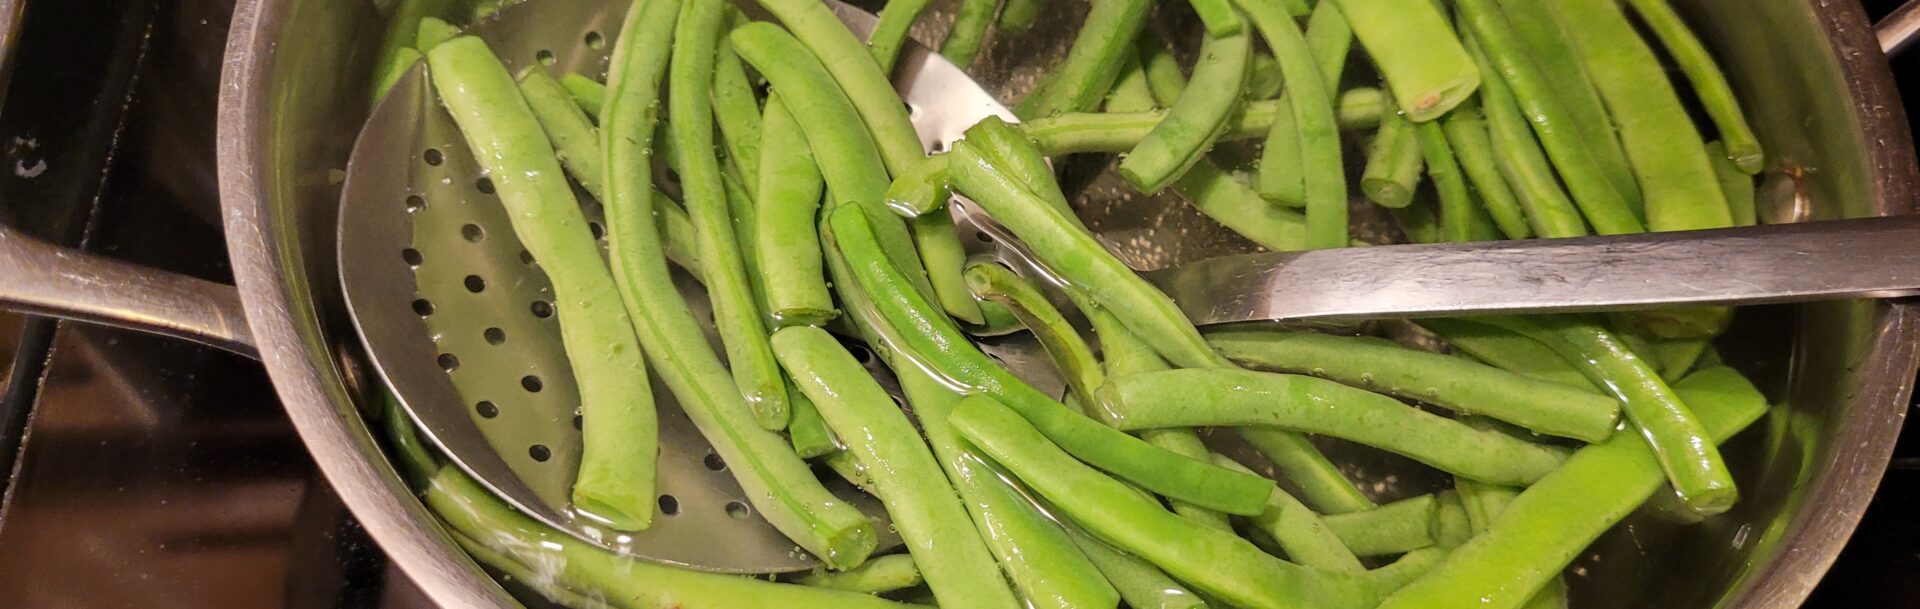
I rewashed them and then put on a pot of water to boil. I boiled the green beans for about 2-3 minutes. Note: do not overcook.
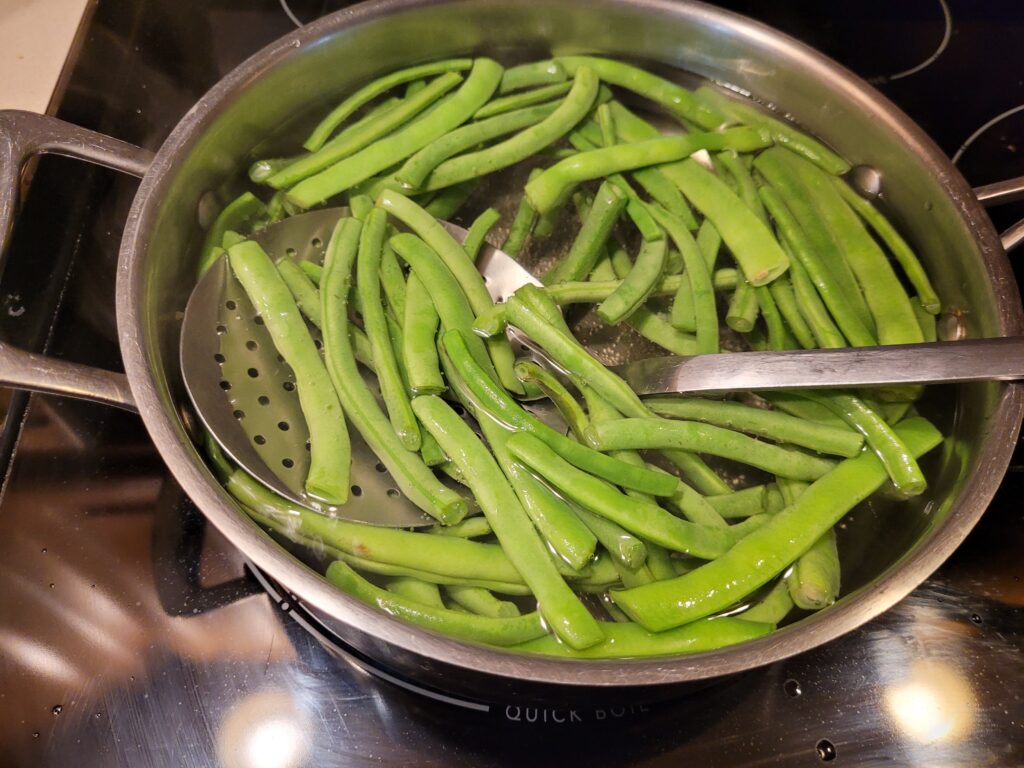
When blanching the green beans, be sure to bring the water to a full boil before adding the green beans.
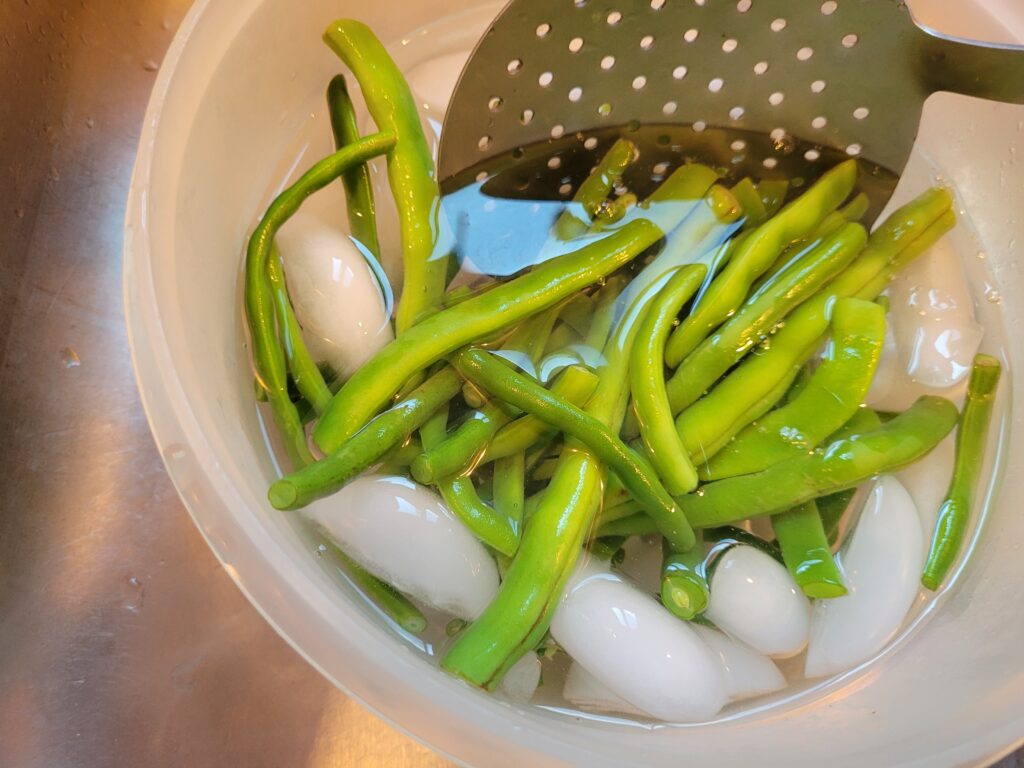
Then immediately place the green beans in a bowl of ice water to stop the cooking. The last thing you want is mushy green beans which have been over cooked. I like using my big ladle with holes in it for this project.
Packing and Freezing Green Beans
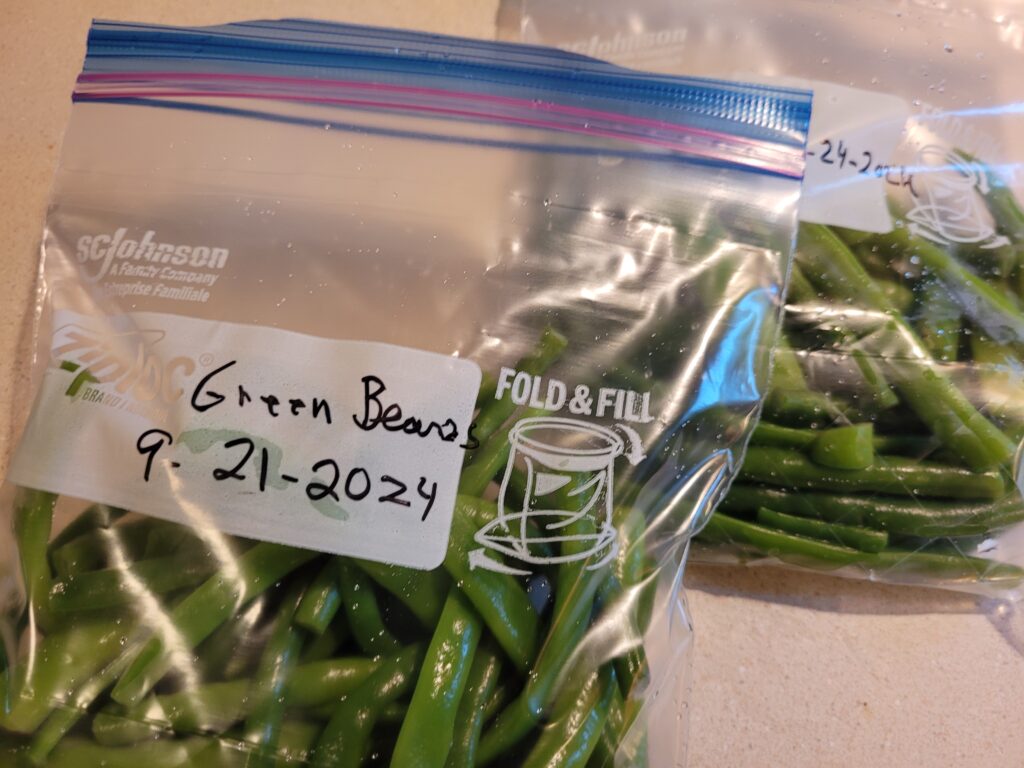
The next step is to pack freezer bags with the cooled green beans. Be sure to mark the date on the freezer baggies so you know how old the food is. I used pint sized baggies.
Lastly, use a regular plastic straw to pull the air out of the freezer baggie, seal and then freeze.
Use a permanent marker to mark the date on the baggies. I, also mark what is in the baggies.
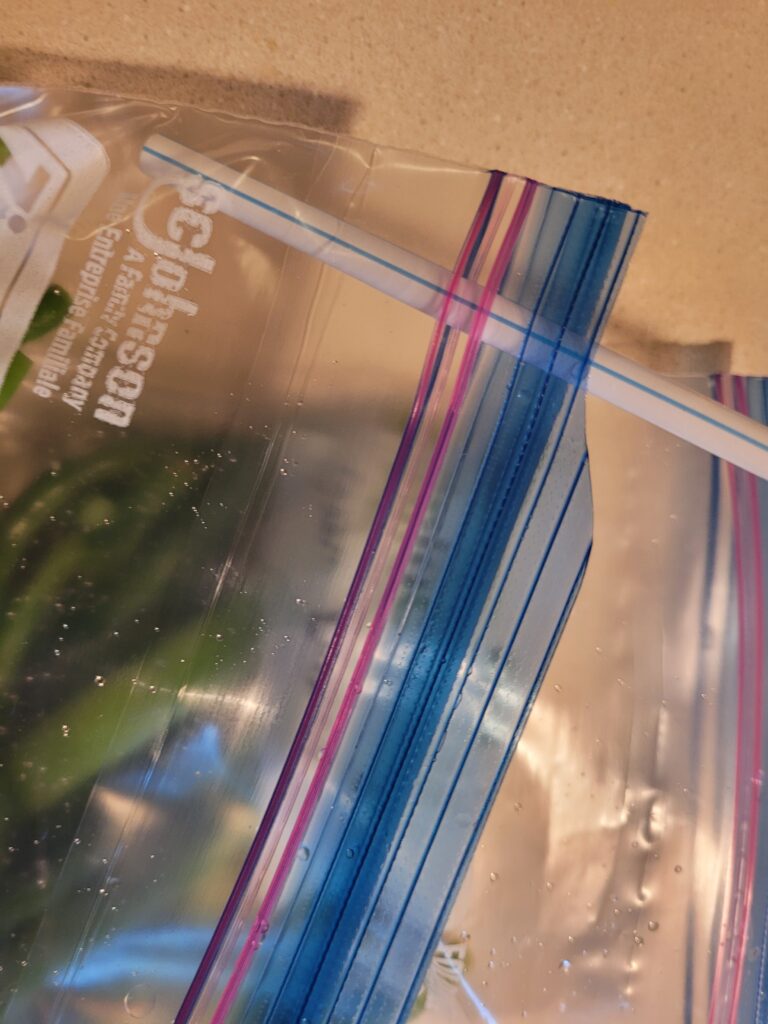
The last step before freezing the green beans is to use a straw to pull out the excess air in the baggies.
Ending Notes
This is the first time I have frozen green beans, but I’ll let you know how they taste when I use them.
I always like it when I can be frugal and save food for another meal.
A special Thank You to the Gardener who gave me all those Crisp Green Beans and the idea for today’s blog.