
The first step in making a faux apple pie is to find a pie pan to use as a base for the project.
I was going for a 1930’s look, so I needed an old, beat-up pie pan. You can, also, use a new pie pan but it will give a newer look.
Faux Apple Pie – Making the Support “Filling”
After you find your pie pan, measure and then fill the bottom of the pie tin with Styrofoam cut into circular shapes. Do this until you reach the top rim of the pie tin.
Then glue Styrofoam circular shapes together if needed. I used white household glue. If you try to use a hot glue gun, the Styrofoam will start to melt. The circles most likely will have to be cut or carved a bit with a sharp knife to fit the shape and side of the pie pan.
For the top layer, randomly glue small chunks of Styrofoam to simulate apple slices poking up under the uneven crust.
Styrofoam is difficult to glue together so you might want to also use some wooden toothpicks to reinforce the project.
Do not glue the Styrofoam insert into the pie pan until you are at the last step of the project. At this early stage, it is helpful to be able to move things around a bit.
Making the Faux Crust
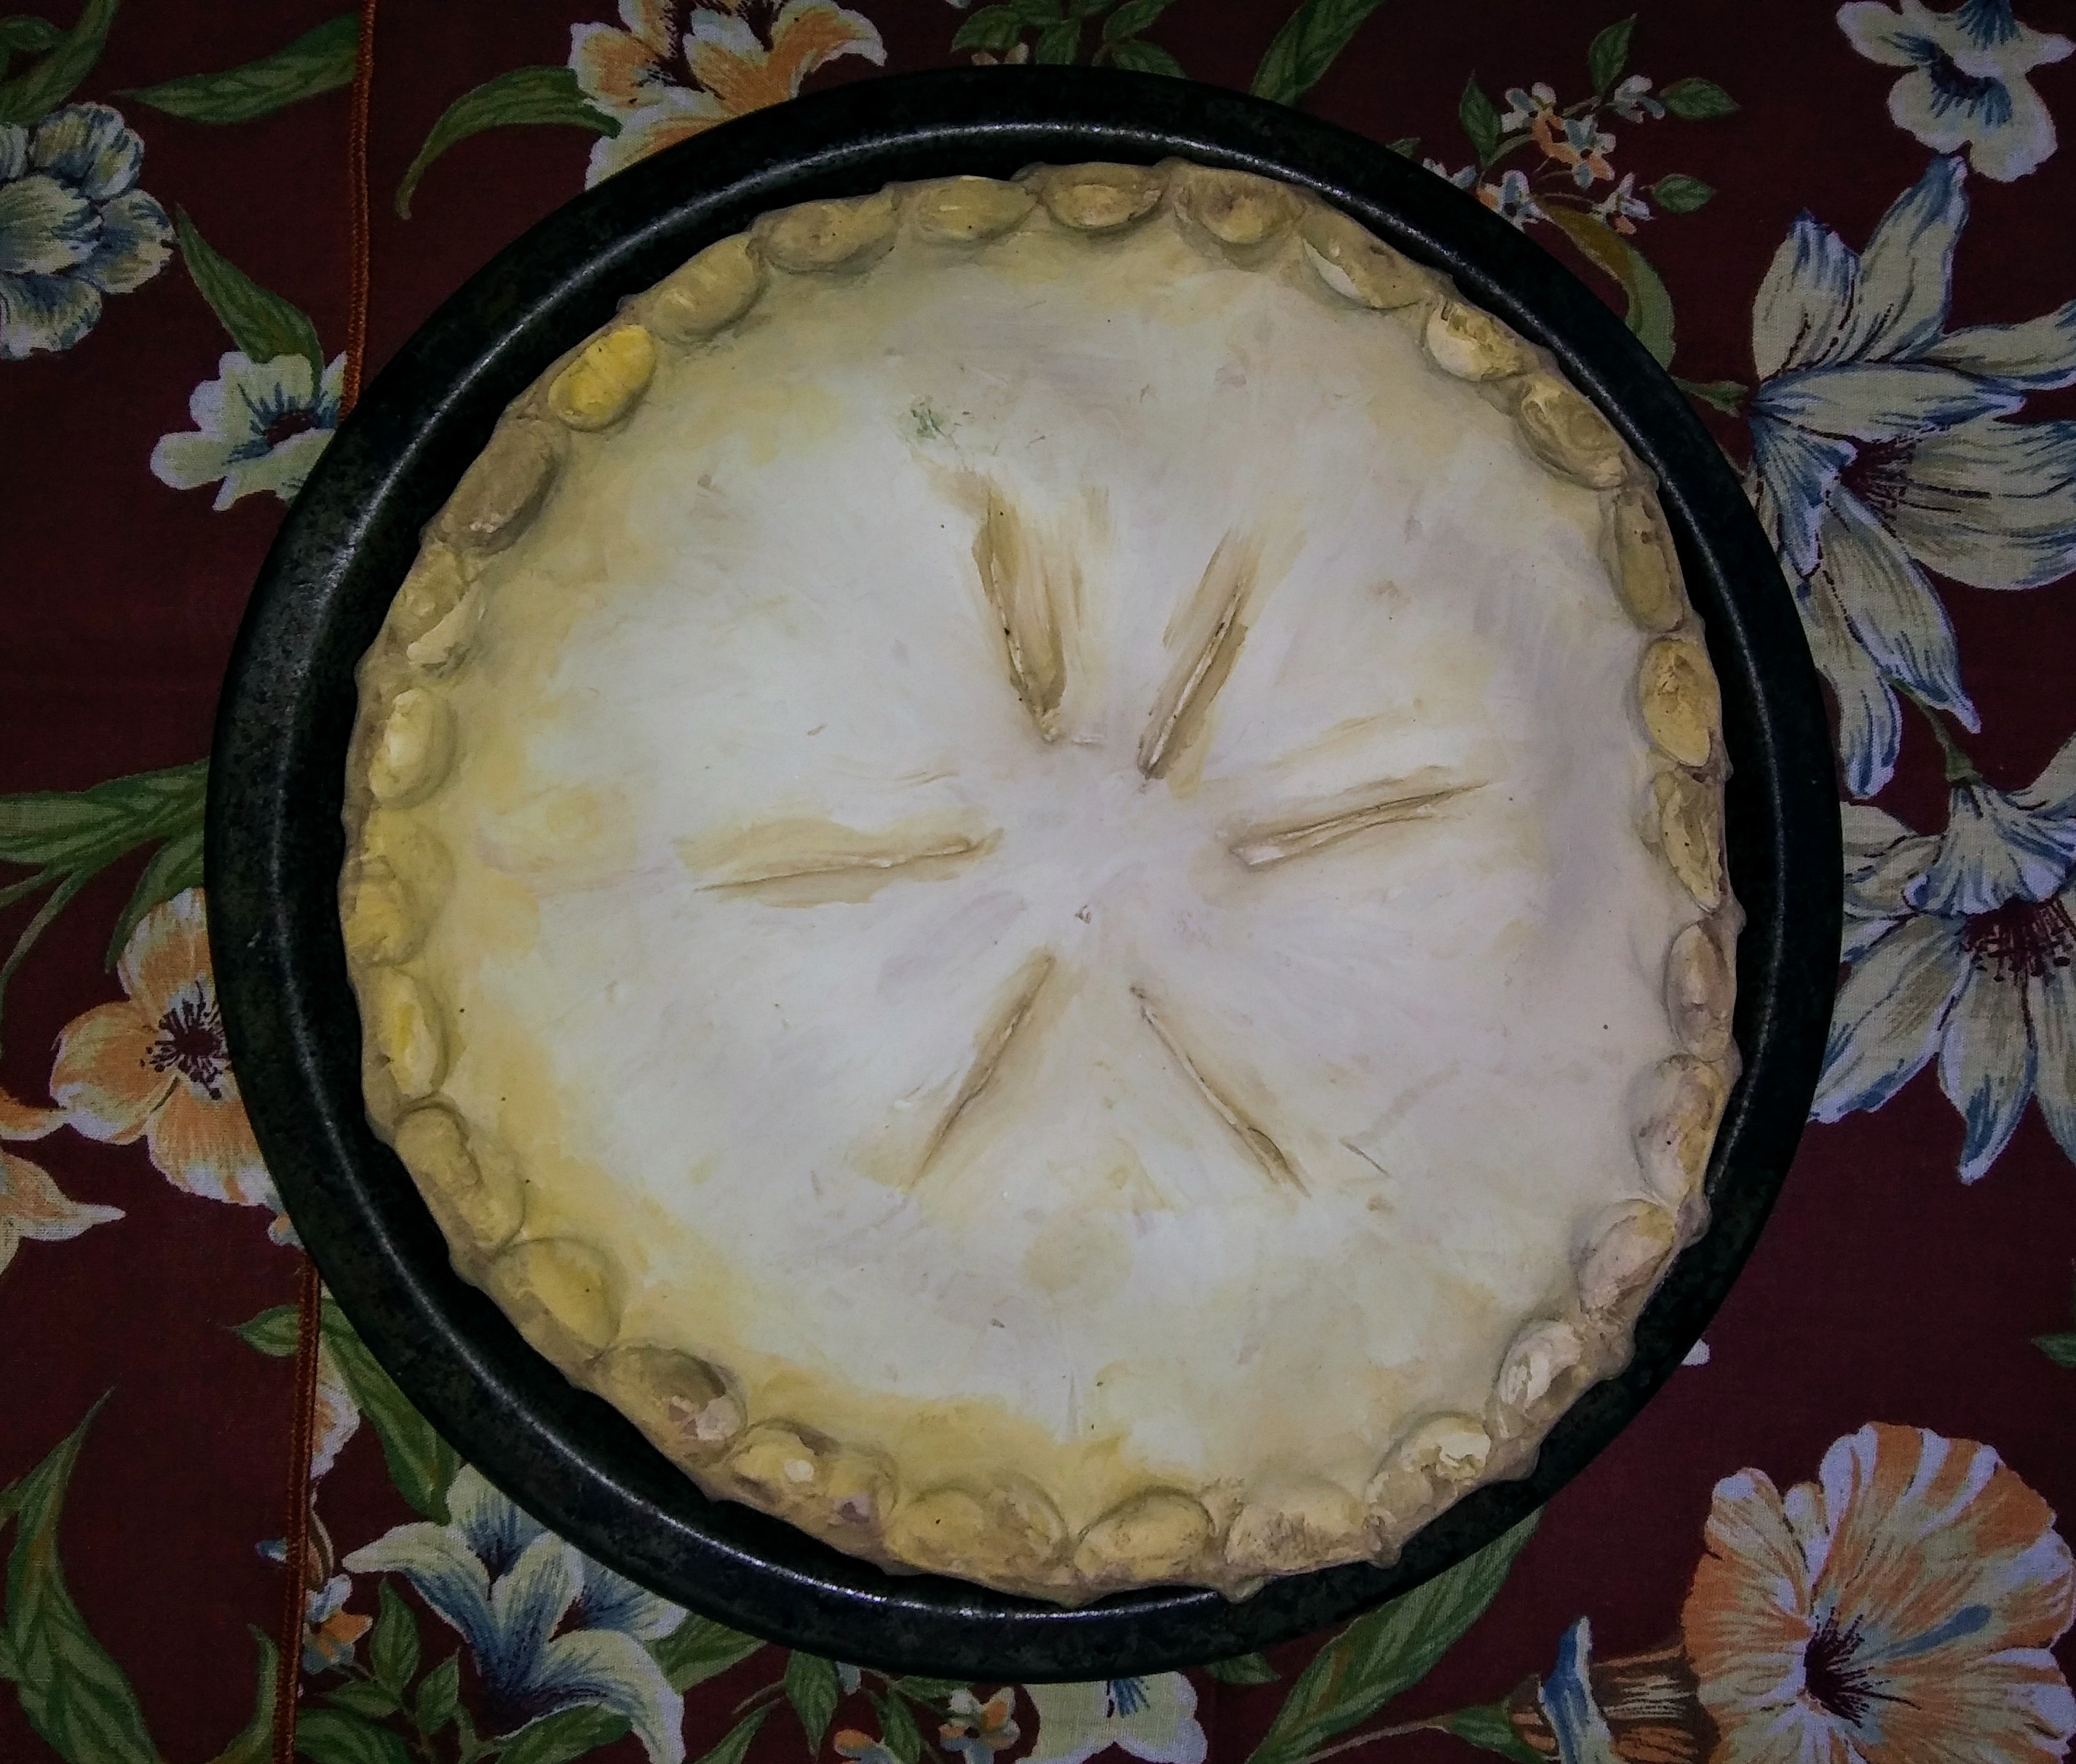
Use one or two packages of white Crayola Model Magic Modeling Material to roll out for the crust top. Since there are a variety of pie pan sizes, you will have to estimate the amount of clay needed for the top crust project.
For easy lifting, roll the clay on wax paper with a regular rolling pin. Roll the top slightly thicker than a normal pie crust and place over the prepared Styrofoam base. Crimp the edges with your fingers or use a fork. Use a sharp knife to cut five or six slices in the top to simulate pie vents. Don’t cut all the way through the clay as you don’t want the Styrofoam to show through.
Allow the top to thoroughly dry. During the drying phase, be sure to check on it to make sure the edges are not adhering to the pie pan rim. The crust will shrink slightly and you don’t want it to crack at this point.
When the clay pie top is totally dry, paint with acrylic paints to simulate a baked pie. I used tan and brown colors. Be careful not to get paint on the pie tin. Paint the crimped edges slightly darker to simulate a baked pie crust.
Carefully lift the painted crust and Styrofoam base and use rubber cement on the bottom of the pie tin to hold the first layer of Styrofoam to the pan. You can also use white household glue.
 Faux Pie in Vintage Pie Pan
Your faux apple pie is now ready for display.
This faux pie can also pass for peach, pear, or what ever type of crusted pie you need.